Tuesday, September 15, 2015

guest bathroom {remodel}

Hello! I am so proud of this guest bathroom remodel that I'm blogging about it and it takes a lot for me to take the extra time to blog after a project these days! 

Kevin and I really worked more together on this room/project than any previous project/redo and I really feel like we are getting the hang of tearing stuff up and making it our kind of pretty :)

Most importantly, here is the finished project:


Can you really appreciate the finished product with out some good 'ol before and afters??? 
I hardly think so...


And just so you don't think this was a 2 day HGTV redo I'll throw in some progress pics that are between week 2 and month 2! 
We actually finished this project faster than any other room we've redone... about 5 months from start to replacing the light switches (replacing the light switches typically takes us a whole year to decide it's finally worth the effort to do!).


The Top 3 things I love most about the new bathroom:

1. The bathtub is bigger! 2" higher and 2" wider, and it's amazing!
2. My custom barn wood mirror by Kelsey Farms... I felt like Joanna Gains for this remodel "let me just have my personal carpenter whip this up for me..."!
3. Everywhere I look, I'm reminded how skilled Kevin is at making what's in my head come to life!


Come visit, it's been a month now so I might rescind the "no bathroom use" restrictions - You're probably rolling your eyes, but the bathroom was perfectly pristine! I had to maintain that status for as long as possible!!!


Resource list:
Floor: Sausalito ceramic tile from Lowes
Vanity Paint: Naval by Sherwin Williams color matched in Valspar by Lowes
Vanity Top: Style Selections Cultured Marble from Lowes
Vanity Hardware: Lowes
Bathtub: Vikrell tub and surround from Lowes
Barnwood Mirror: Custom made by Kelsey Farms
Ladder above toilet: custom made by Kevin & Abby
Basket on ladder: Michael's
Small boxwood wreath: Jeffrey Alans
Hand Towel: TJ Max
Small Clear Mirror: TJ Max
Terrarium: Pier 1
Towel Hooks: Hobby Lobby
Jesus Artwork: Hobby Lobby
Shower Curtain: Kenneth Cole from Bed Bath and Beyond
Shower Head and Faucet: Pfister from Home Depot
Magazine basket: Gordman's
Wall Paint: Ancient Marble by Sherwin Williams
Vanity Light: Archie Venetian from Lowes
Exhaust Fan with Light: Utilitech from Lowes
Vent Cover: Allen and Roth from Lowes
Walls: Wrong side of 8" car siding from Menards
Toilet: Lowes
Door and Door Hardware: Menards


Monday, May 18, 2015

lemonade {bridal shower}

I love how simple a theme this lemonade shower was and how very cute it turned out!
This was another church shower so I planned with a "committee" and my friend, Danielle, hosted at her home.


This tray was from a set of 3 that was a birthday gift from a friend. 
All the flowers were picked from local back yards... and front yards!


The lemons in the jar were real, but the one sitting out was a cute ceramic lemon I found, just recently, at Target.


The garland was my favorite part for sure! I resized a free printable I found online and then even printed a pink chevron on the back side (sorry, I have no pictures of that side)! I used my 2" hole punch for easy cutting and then sewed the lemons together at different heights on the lemon to create the slightly uneven look I was going for! Then, I just got a few yards of the pink pom poms and the yellow zig zags. Watch out! I'm pulling out the intense technical terms now!! ;)


I also loved the sliced lemons in this vase/pitcher... however, they were not so easy to do. 

For this success, I found a cylinder vase that just fits into the pitcher and I was able to do one side with lemon slices- by holding the vase on it's side, laying out lemon slices and then carefully inserting the cylinder vase. Took me waaay to long to figure that out, but it sure is a cute end result!


Now for the actual lemonade! Which of course, I didn't take a picture after we filled the dispensers with regular and pink lemonade... but I think you'll get the idea.

The lemonade sign was inspired by the adorable letter stickers from Hobby Lobby. Which I then layered scrapbook paper, added ribbon, ribbon holes and a few cute flower stickers I had on hand to snazzy it up.


All the lilacs smelled wonderful!


I printed the lemon printable on white sticker sheets and used my 2" hole punch just like for the garland. The straws I had from a party store in Houston... they were too cute to pass up when I saw them last year!


The food table was super cute as well!


bacon ranch cheese ball and crackers


Above and below are the other 2 cute trays from my 3 tray set 
{a gift to me, but from Sam's Club originally}


Girl Scout "lemonade" cookies and the invite from this Etsy shop.


Chocolate coated oreos on a stick, sitting in lemon heads... can you say adorable? :)


Mini chicken salad cups... yummy and pretty!


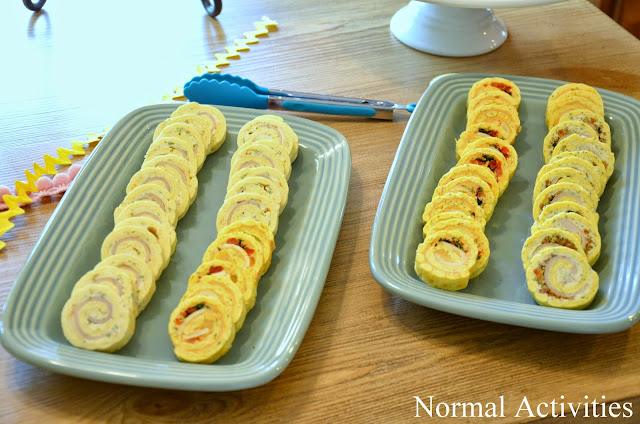
And pinwheels to complete the snack foods for out 2pm shower!


Here's my pinterest board for more ideas.

I could really use a tall glass of ice cold lemonade about now...


Wednesday, May 6, 2015

breakfast coffee shop {bridal shower}

2015 is the year of weddings and all things wedding related. My younger sister is getting married in about a month (lots more on that as it happens!) and several couples from our church are taking the plunge this year as well ;)

This is a breakfast coffee shop themed shower I did for my friend, Chelsea. 
This was a church shower so we had a "committee" of five and my friend, Erin, hosted at her home.


I made this cool coffee filter wreath with these instructions. I found both colors of filters at my local grocery store. I did not cut a hole, but rather just used a large darning needle and poked through the center of the filters. I also tied a knot on both sides of each "bunch" of 15 filters so that they would be sure to clump together... basically you just scrunch and crumple after that part!


This printable was a download from etsy that I got on sale.


Both the love signs on the right I already had {from Target & Gordman's clearance sections}
The invitation was done by my very skilled friend, Samantha.


I also had this coffee art already, originally from Gordman's


This cute antique strawberry crate/basket is from Kevin's grandma. I spray painted these recycled cans in blue, silver and copper. Then filled them with mixed white flowers and greenery for party favors. I think they look so sweet :)


Now for the all important breakfast FOOD table!


I found this cute blue coffee pot and the thrift store for $1 and the sign is from Hobby Lobby. 
O yes, and the candles! For cans that didn't have flowers, I filled them with coffee beans and a tea light so we'd get that coffee shop smell (pinterest gets the credit for this idea... of course)!


I have finally found a donut shop in town that is worthy of my attention! Market street bakery is wonderful, especially their chocolate icing! These are waxed paper bags, that I folded down and added ribbon for cuteness and color


The other girls, made sausage biscuits, fruit cups, blueberry muffins & cinnamon rolls, YUM!
My friend also designed the stickers for our coffee sleeves, they are too cute!


Obviously we have coffee and additives... and OJ :)


Our activity was a custom crossword puzzle. It was so fun and personal and fit the breakfast coffee shop theme to a T
{You can just google custom crossword and there are several options on multiple sites}


Hard at work on the crossword... Yes, I do believe Danielle is cheating on her phone ;)


Sadly, this is the only other pic I took of people: Chelsea opening up her gifts.


Now you may think this shower is all about me and my love for coffee, but Chelsea certainly enjoys her coffee as well! And who doesn't love breakfast?!?!

Here's my pinterest board for the shower.


Thursday, April 9, 2015

peter pan {rustic barn wood sign}

I joined forces with my friend, Klarisa and her Dad, to make this sign for a mutual friend's nursery.
The Peter Pan quote is so very sweet!

(cell phone photos again, sorry for the poor quality)


Klarisa and her Dad put the sign together with old barn boards and I did the painting.

I do not have pretty hand writing so I meticulously printed, cut, traced then painted the words onto the boards (I used a white gel pen for the tracing).


I also opted to paint a coat of black paint on first so that the white wording would be sure to stick out.


After the painting was done I went back and "beat up" the sign, by sanding and banging on it with both ends of a hammer. This was very stressful for me, as I thought the sign looked great after I was down with all the hard work of painting and was afraid I'd mess it up by roughing it up!
I trusted the advice of pinterest though, and I do love the results with the more rustic look!